
Sage 100 Paperless Office: How to – Part 1

Paperless office is one of the Sage 100 modules that we here in support get a lot of calls about. In Part 1 of 3, we will show you how to do things like how print forms to PDF in Paperless Office and how to e-mail customer and vendor forms in Paperless Office.
Now here are some of the most common how-to tips that people have called in and asked about:
How to print forms to PDF using Paperless Office
Before you can print any forms to PDF using Paperless Office, you first need to set its preferences:
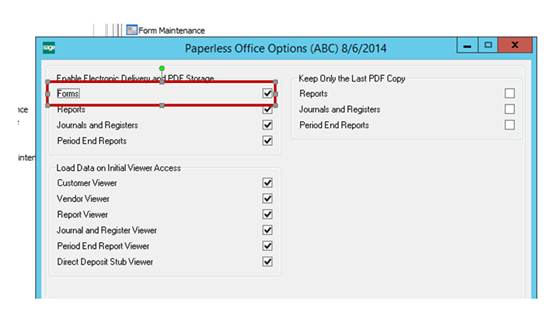
- Expand Paperless Office and Setup. Double-click Paperless Office Options.
- In the Enable Electronic Delivery and PDF Storage area, click the Forms check box, and click Accept.
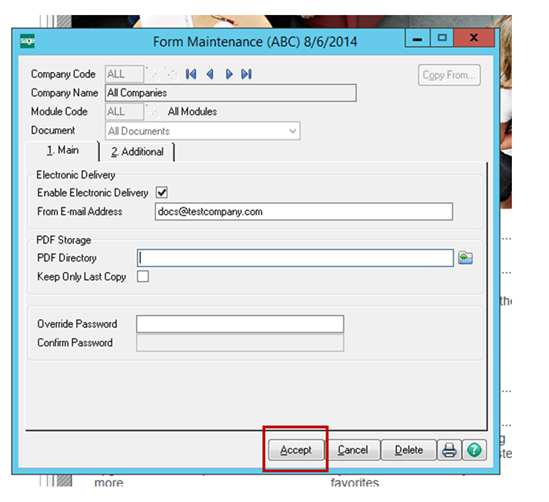
- In Setup, double-click Form Maintenance.
- Fill-in the following fields:
- Company Code = The desired company code (or All).
- Module Codes = The desired module (or All)
- Documents = The desired form (or All Documents)
- Enable Electronic Delivery = Select this check box if the form will be sent by e-mail.
- From E-mail Address = The default e-mail address that the forms will be sent from.
- PDF Directory = The directory to store the PDF files.
Note: This should be accessible from all workstations that should have access. - Override Password / Confirm Password = Any password of your choosing.
- Click Accept.
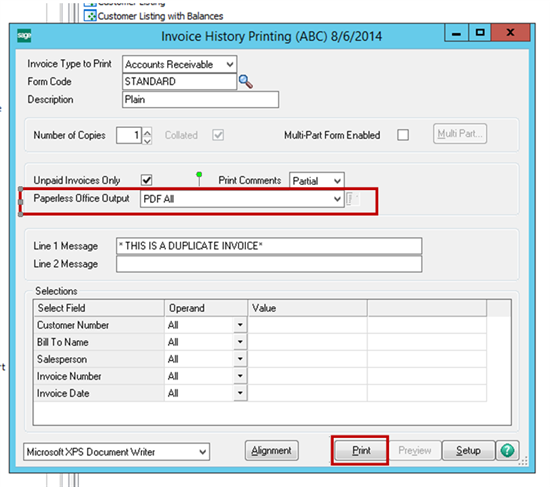
To print a form to PDF:
- Open the form printing task (for example: Sales Order Printing).
- At the Paperless Office Output field, select PDF All.
- Select any options and click Print.
To view the PDF in the Viewer:
- Expand Paperless Office and Main. Double-click Customer Viewer or Vendor Viewer (depending on the form type).
- Select the company code.
- Select the form type printed above (for example: Order).
- Double-click the form printed above to view the PDF.
Note: Reports can be printed, emailed, or faxed for this task.
How to e-mail customer and vendor forms in Paperless Office
The first step is to set the system preferences for Paperless Office
- Expand Paperless Office and Setup. Double-click Paperless Office Options.
- In the Enable Electronic Delivery and PDF Storage area, select the Forms check box, and then click Accept.
- Expand Paperless Office and Setup. Double-click Form Maintenance.
- In the Company Code field, select the desired company.
- In the Module Code and Document fields, select all.
Note: Select all modules and all documents to set a default location to save the documents in .pdf format. To set up specific combinations, select a certain module code, document, and location. The settings for a specific combination take precedence over all settings.
- Select the Enable Electronic Delivery check box to specify a default e-mail address.
- In the PDF Storage area, enter a valid directory that is accessible to all workstations.
- In the Override Password and Confirm Password fields, enter the password, and then click Accept.
Then set up the customer or vendor-specific forms for Electronic Delivery (this example uses Accounts Receivable)
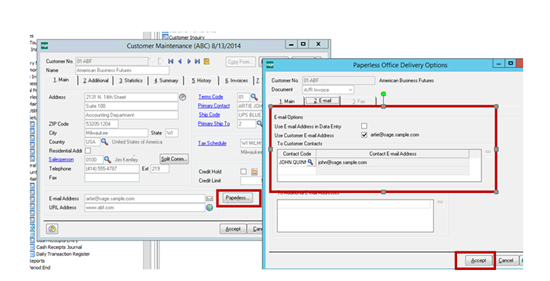
- Expand Accounts Receivable and Main. Double-click Customer Maintenance.
- Select the desired customer
- Click the Main tab, and specify the primary e-mail address.
- Click the Paperless button.
- In the Document list, select a document (for example, A/R Invoice).
- In the PDF Delivery Options area, select E-mail (Print and Fax, if necessary).
- Click the E-mail tab.
- Select the Use Customer E-mail Address check box to use the primary e-mail address on the customer account.
- In the To Custom Contacts area, select a primary contact code to use when e-mailing this customer.
- Click Accept, and repeat the steps above for each document (if all documents was not selected).
How-to e-mail the form using the printing task (this example uses Sales Order Printing)
- Expand Sales Order and Main. Double-click Sales Order Printing.
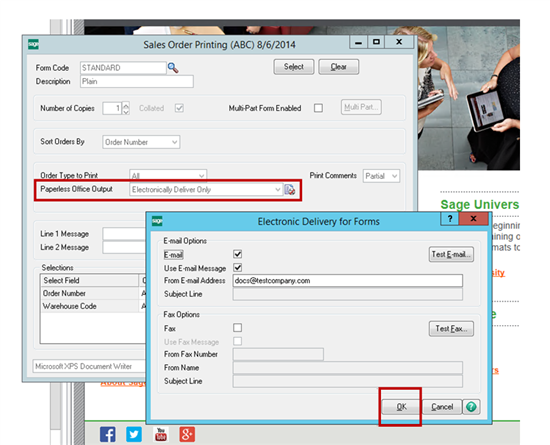
- In the Paperless Office Output list, select Electronic Delivery Only, and click the E-mail button.
- Verify the e-mail settings are correct, and then click OK.
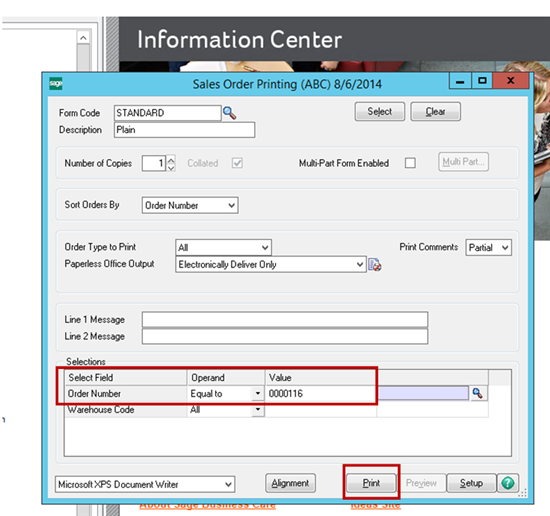
- In the Selections area, select the following on the Order Number row:
- Operand = Equal to
- Value = enter a sales order number to print
- Click the Print button, and the sales order form prints as a .pdf file or electronically delivered depending on the delivery option selections.
Note: If the document is not electronically delivered or printed as a .pdf file according to the delivery options defined in the printing window, review the document setup in Customer Maintenance (or Vendor Maintenance).
Article Courtesy of Sage