Zoho inventory is integrated with QuickBooks Online to make your accounting and inventory management go hand-in-hand. With this seamless integration, QuickBooks customers can easily access all their sales and purchases in Zoho Inventory.
With this integration you can:
Import your accounts and contacts into Zoho Inventory from QuickBooks Online.
Export your invoices, credit notes and bills along with their payments from Zoho Inventory to QuickBooks Online.
Prerequisites
You must have an active account with QuickBooks Online.
You cannot connect multiple QuickBooks organisations to your Zoho Inventory organisation and vice versa.
Your QuickBooks organisation with which you wish to integrate, must have the country as the US.
Ensure that the base currency of both these organisations is the same.
If you have enabled multi currency in Zoho Inventory, then you have to enable the same in QuickBooks too.
Set up QuickBooks Online integration in Zoho Inventory
Integrating Zoho Inventory with QuickBooks Online is a simple and straightforward process.
Log in to your Zoho Inventory account.
Navigate to the Integrations tab on the sidebar.
Choose the Accounting tab.
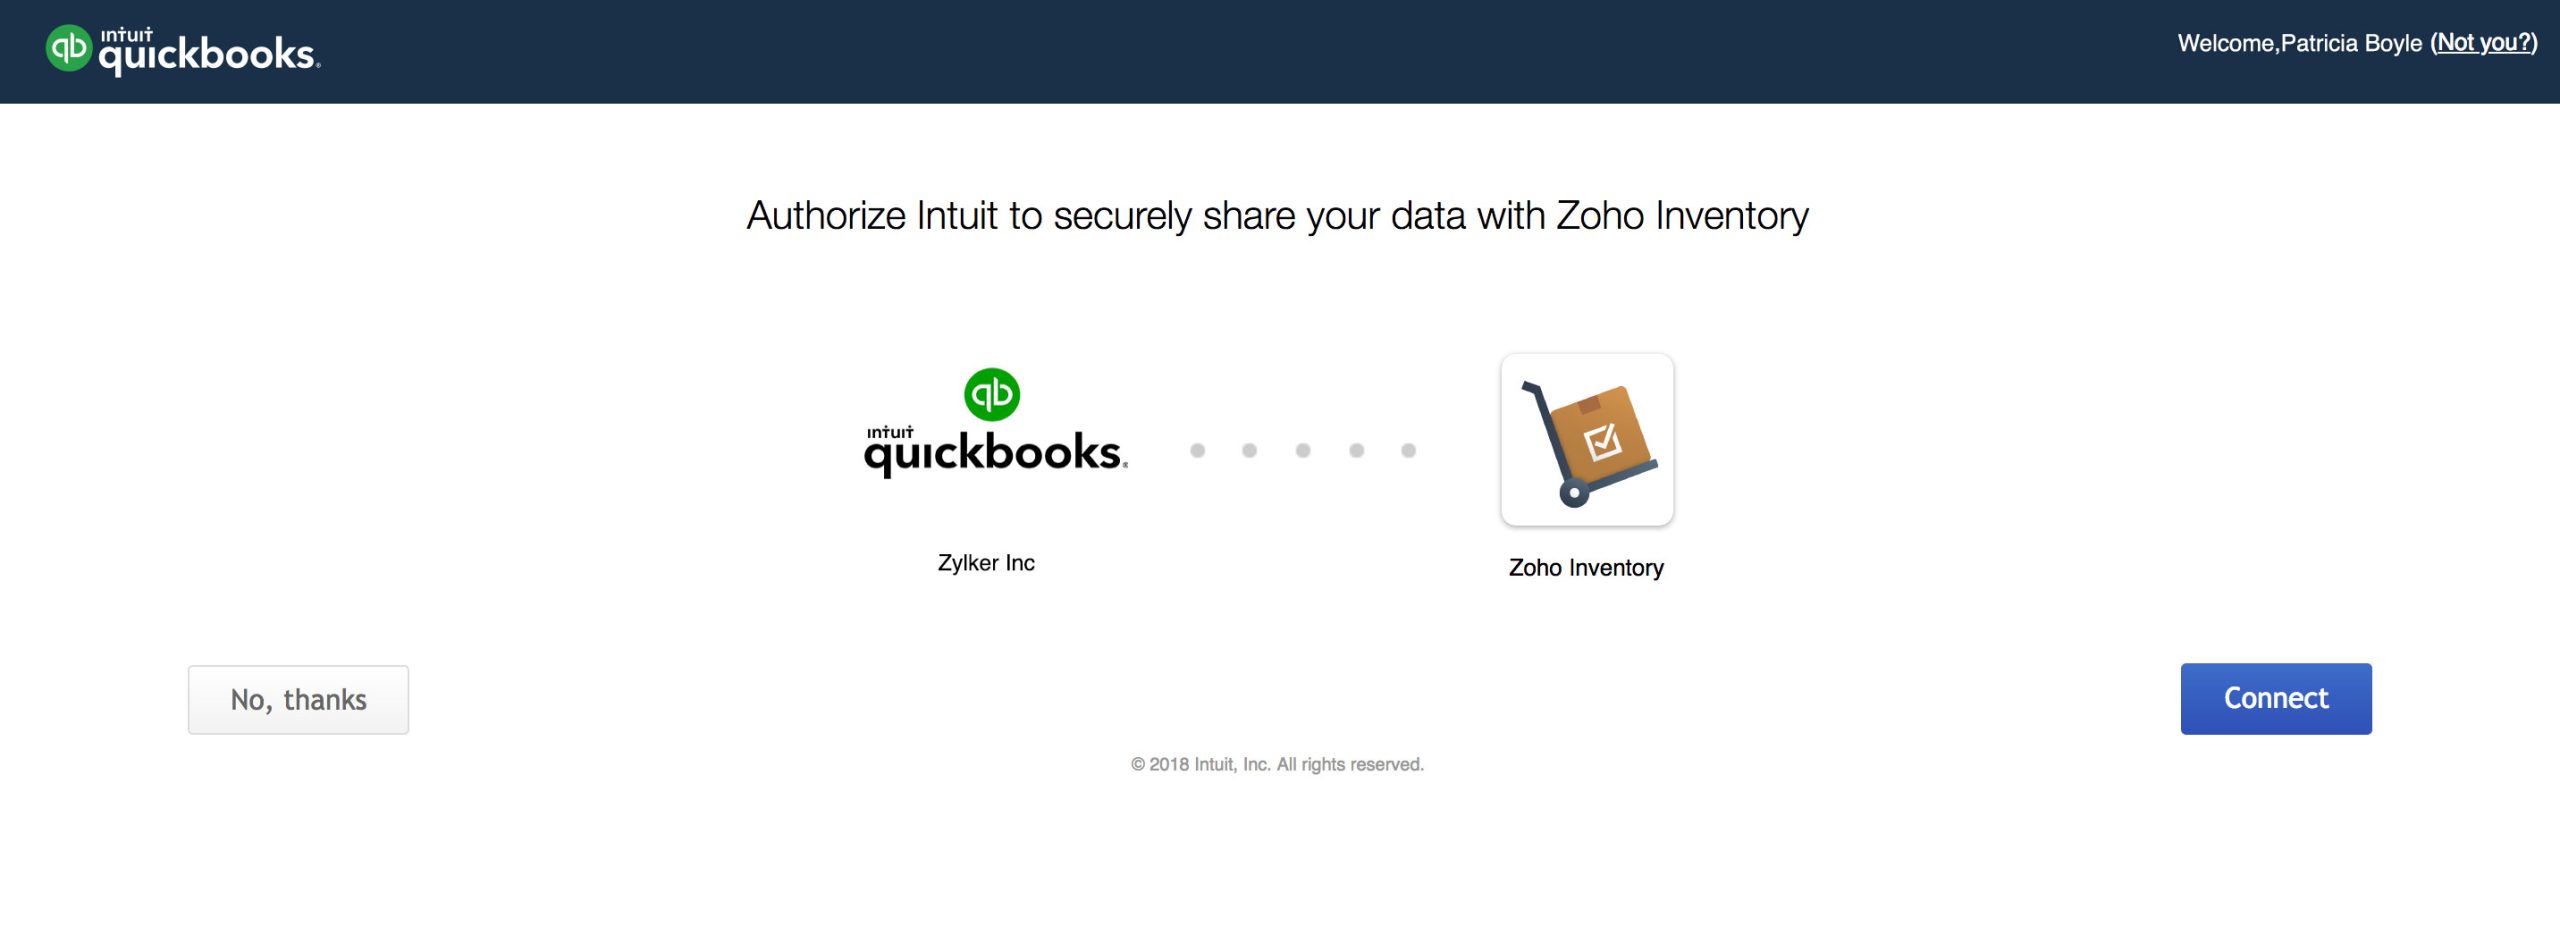
Click the Connect to QuickBooks button next to QuickBooks Online. You will be redirected to QuickBooks Online sign-in page.
Enter your credentials to sign in.
Select the organisation you want to connect with Zoho Inventory.
Click Connect to complete the integration.
Configure the integration
Once you have connected with QuickBooks, you will be redirected to your Zoho Inventory account to configure the integration.
Here, you need to configure the settings to import and export from QuickBooks Online.
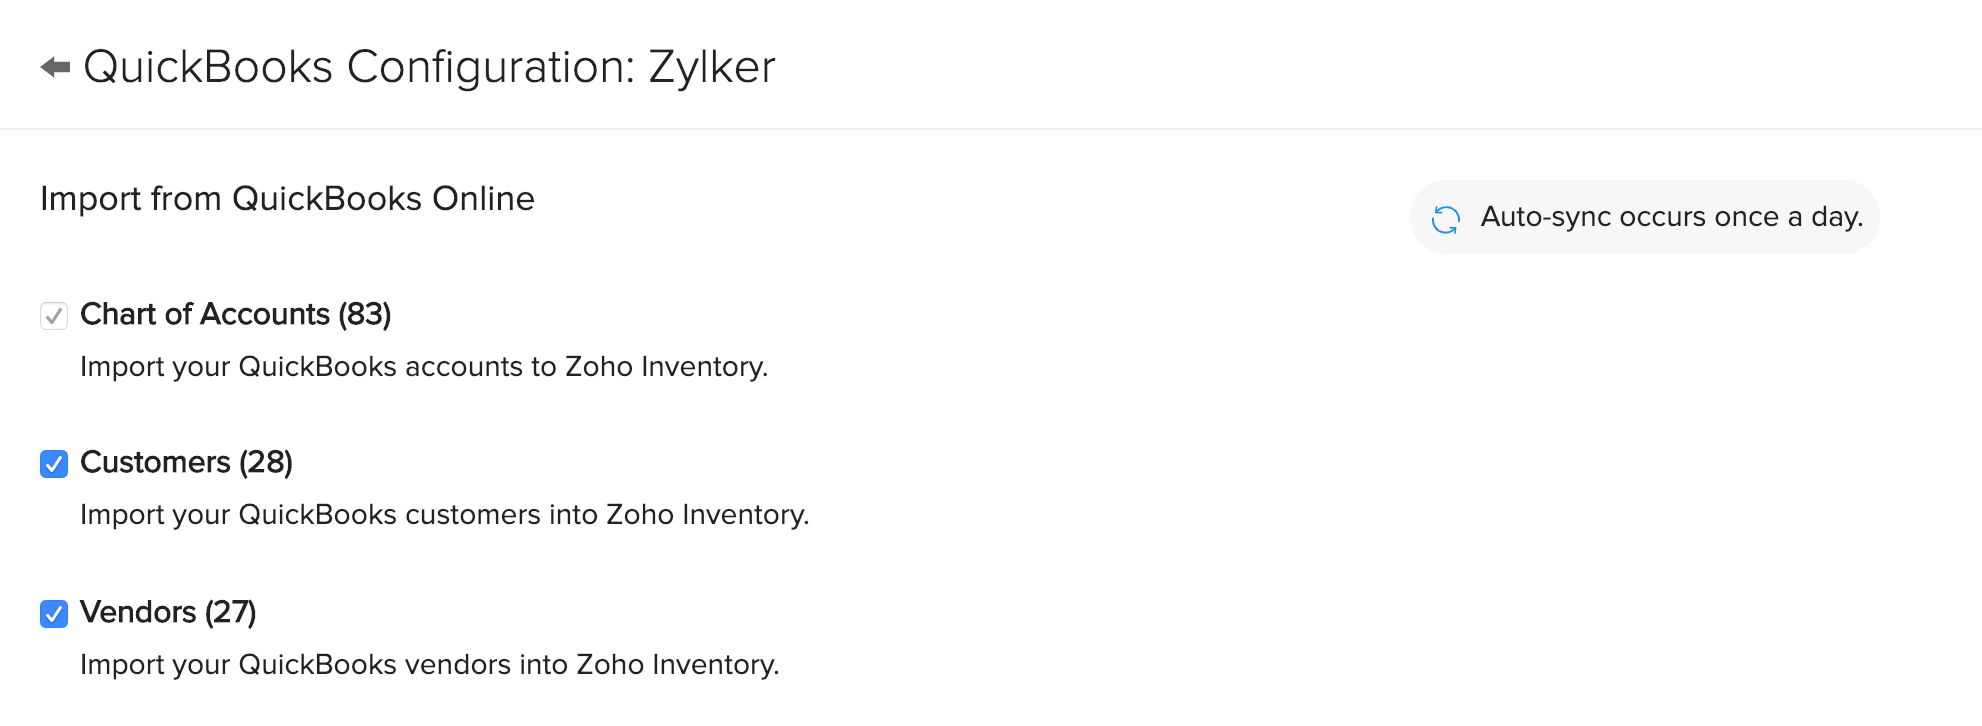
Importing from QuickBooks Online
The following can be imported from QuickBooks Online:
Accounts: All your accounts in QuickBooks are imported as accounts in Zoho Inventory. The accounts get synced both ways, but any changes made to the existing accounts in Zoho Inventory will not be reflected in QuickBooks.
Customers: All your customer details in QuickBooks will be imported as customers in Zoho Inventory.
Vendors: All your vendor details in QuickBooks will be imported as vendors in Zoho Inventory.
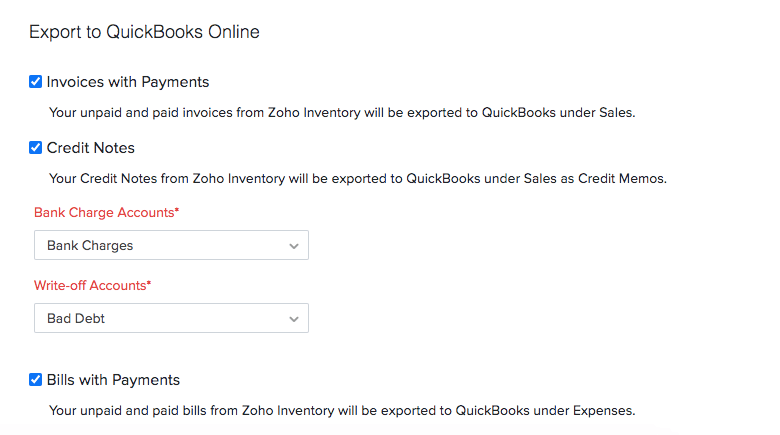
Exporting to QuickBooks Online
Choose the modules you want to export from Zoho Inventory to QuickBooks. You can export invoices with payments, bills with payments and credit notes.
Accounts: Select an account under which you want to record bank charges and write-offs for your invoices.
If or when an invoice is written off in Zoho Inventory, a credit note is automatically created and associated with the corresponding invoice in QuickBooks.
If a payment is recorded with bank charges, the payment amount is initially accounted as undeposited funds and a deposit will be made to the appropriate bank account along with bank charge.
You can export transactions created with the contacts imported from QuickBooks. If you are exporting a transaction created with a contact in Zoho Inventory, then the contact will be automatically created in QuickBooks with the basic details such as name, phone, email, and address.
The underlying items in each invoice or bill that is exported from Zoho Inventory will be created on the fly as Products and Services in QuickBooks.
The transactions will be exported to QuickBooks as and when they are created/updated/deleted in Zoho Inventory.
Tax Mapping
To map the taxes, make sure that you have enabled taxes in both Zoho Inventory and QuickBooks Online account.
Select an existing tax in Zoho Inventory or create a new one, and then select the corresponding QuickBooks tax to be mapped.
Select a zero percent tax from QuickBooks to apply on zero tax or tax exempted items in Zoho Inventory. If you don’t select any, then the invoices with tax exempt items will not get exported to QuickBooks.
When mapping taxes, ensure that both taxes have the same tax rates.
Once the initial setup and configuration is done, click Save to return to the details page.
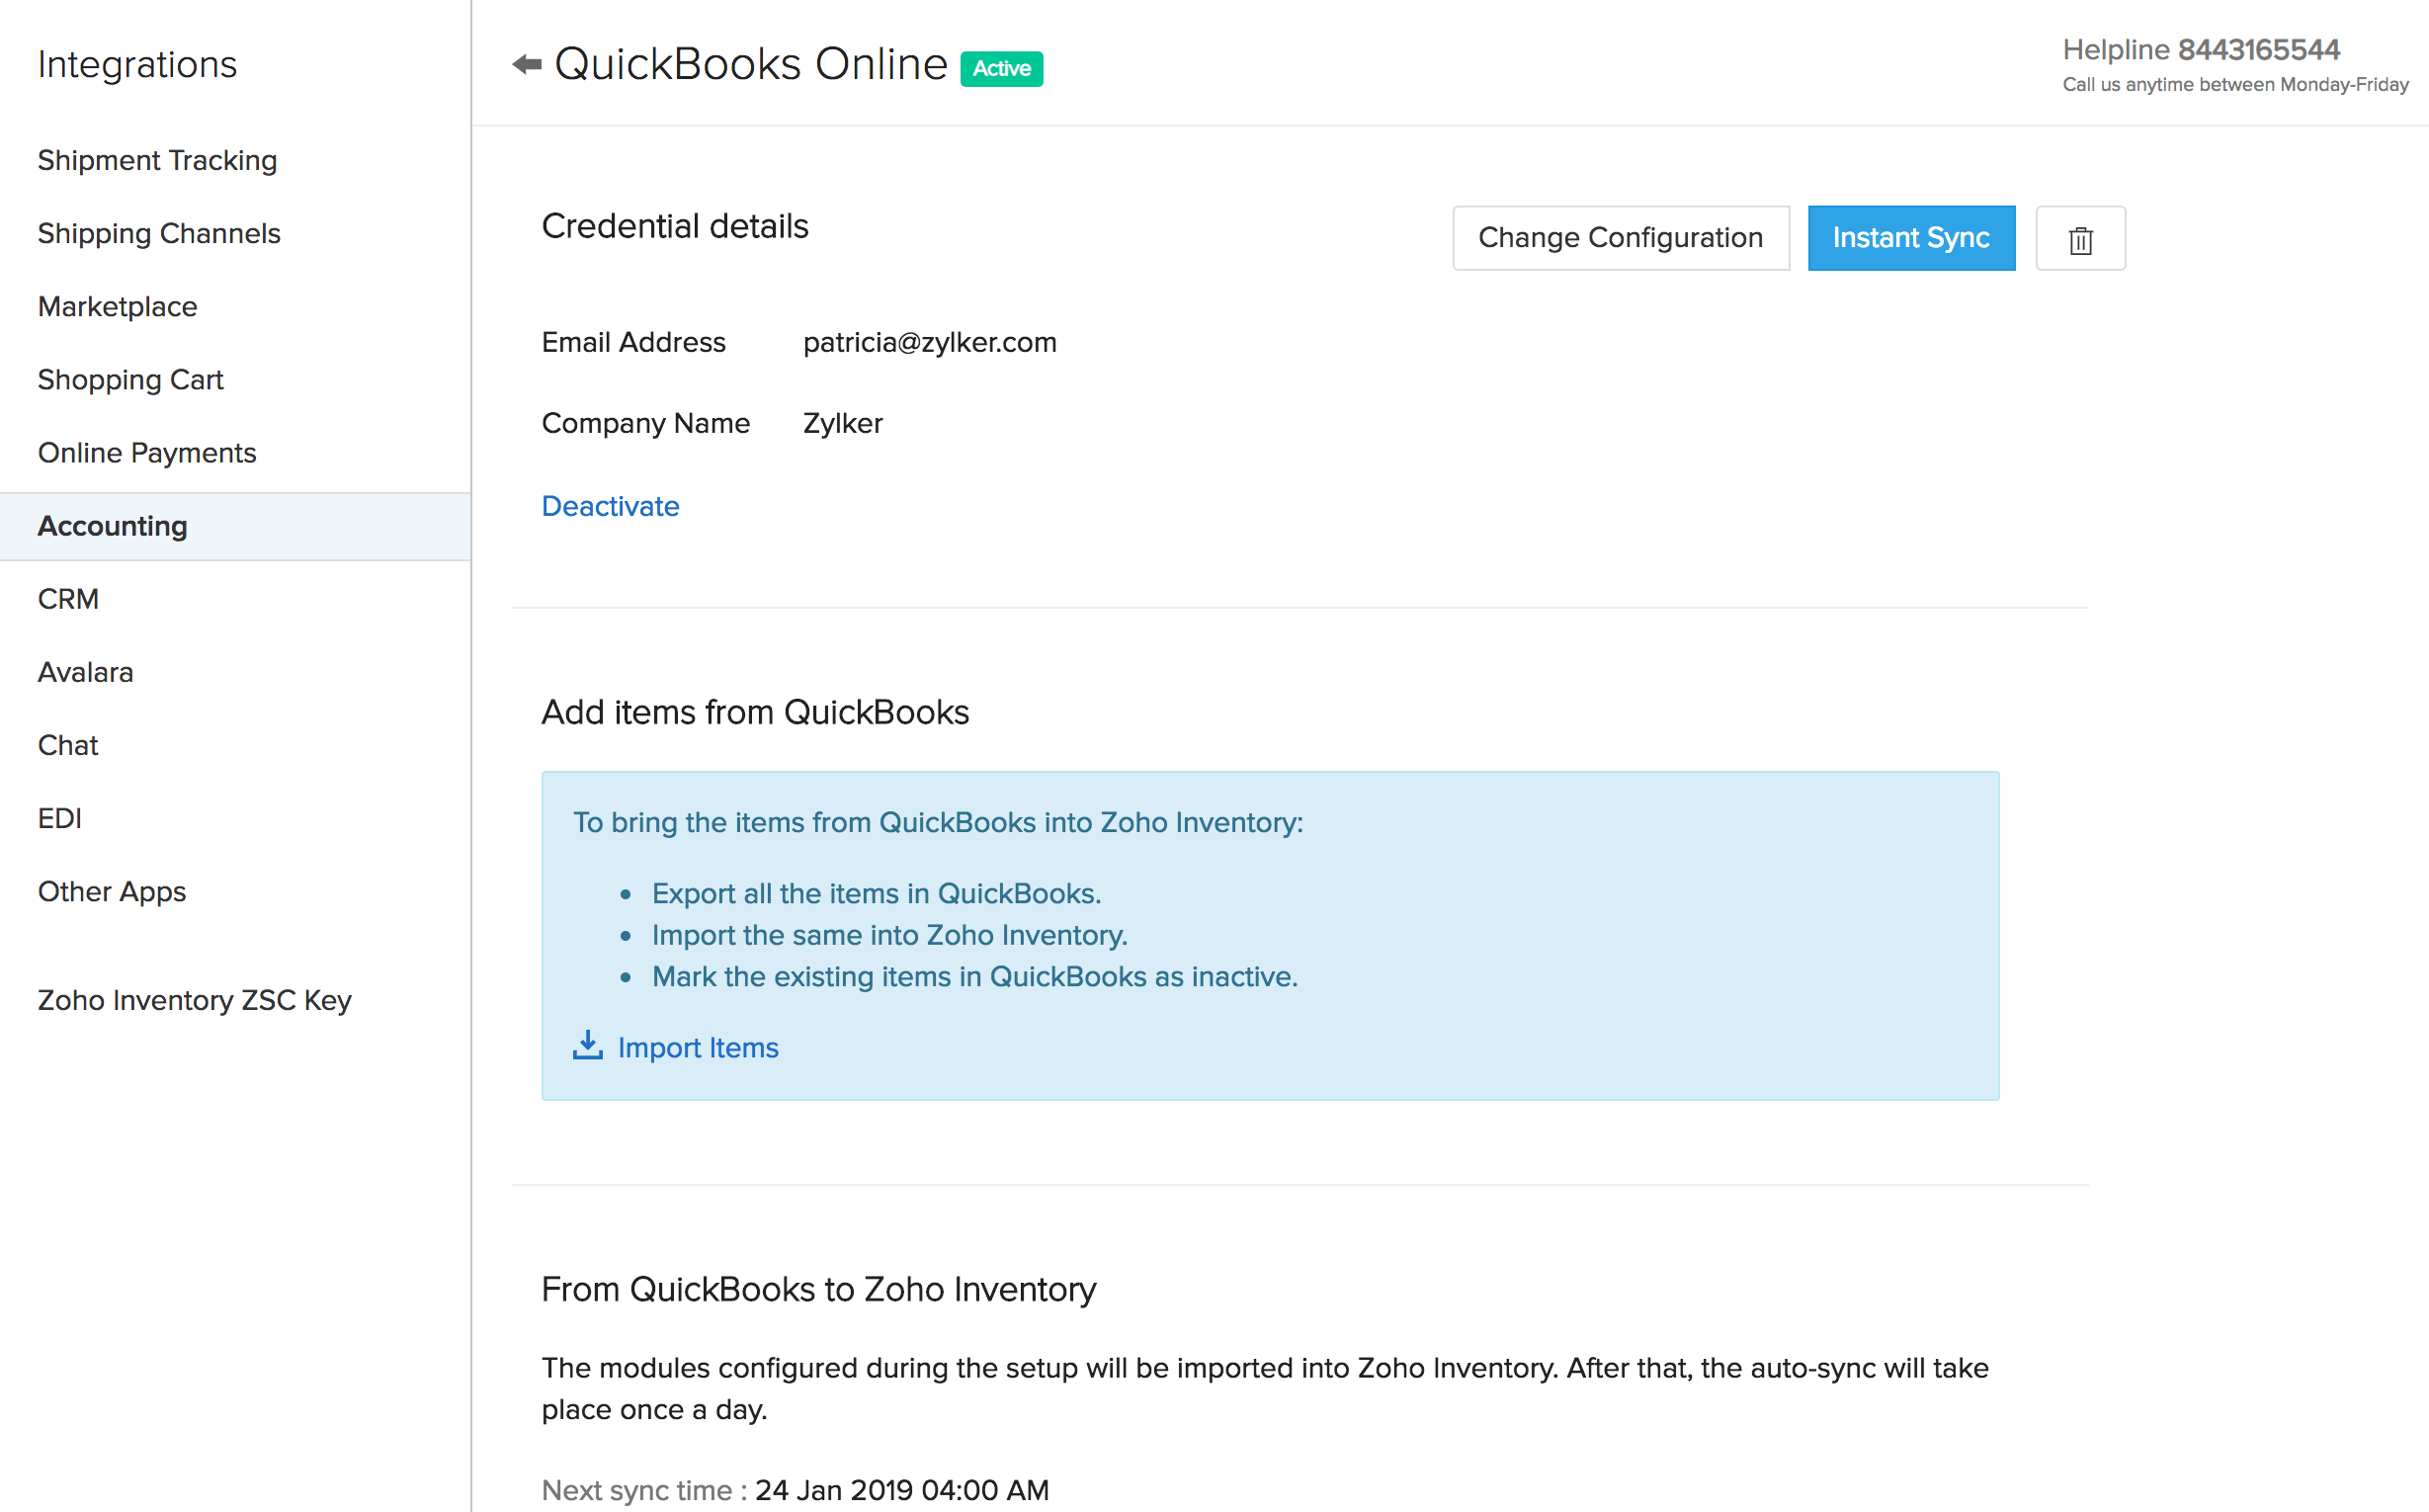
Adding items from QuickBooks Online
Items in Zoho Inventory does not sync with the items in QuickBooks Online.
Since Zoho Inventory is the stock management software, you will have to bring your existing items in QuickBooks into Zoho Inventory. To do so:
Export all your items in QuickBooks.
Import the same into Zoho Inventory.
Mark the existing items in QuickBooks as inactive.
View integration details
After you have configured the integration, you can view the details regarding the integration from the details page.
Any new addition to the list of contacts or accounts in QuickBooks will be automatically reflected in your Zoho Inventory account by virtue of the auto-sync that occurs once a day.
If you want the change to be reflected in Zoho Inventory immediately, you can click the Instant Sync button.
You can change the configurations at any time by clicking Change Configuration.
From the details page, you can also check when the next sync will occur, the last synced time, and view the history of all syncs between your Zoho Inventory and QuickBooks Online.
Sync between Zoho Inventory and QuickBooks Online
Zoho Inventory syncs with the transactions and contacts from QuickBooks Online. The following lists out the sync details.
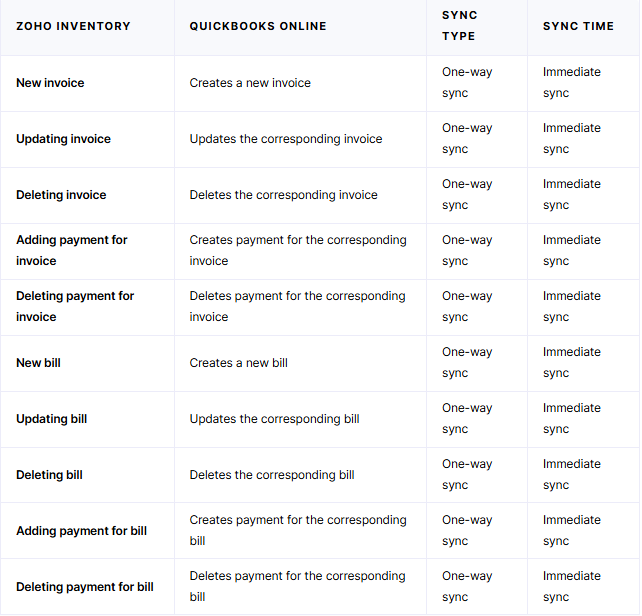
Sync details of transactions
Transactions such as invoices with payments and bills with payments are pushed from Zoho Inventory to QuickBooks Online.
The following table lists out how the transactions are synced between Zoho Inventory and QuickBooks Online.
Overview of Zoho Inventory and QuickBooks Online Integration